Handheld Cold Laser Relief: LED Display for Easy Use
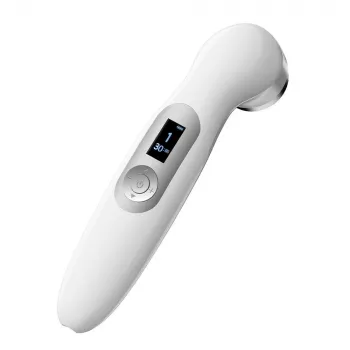
Handheld Cold Laser Therapy for Targeted Pain Relief—With an LED Display for Easier Sessions
Cold laser therapy is a non-heating, light-based approach often used to support recovery and reduce discomfort in muscles and joints. A handheld device with an LED display makes it easier to set time and mode, track sessions, and keep treatments consistent at home or on the go. For anyone building a simple routine around movement, rest, and recovery habits, the right controls can make a noticeable difference in day-to-day follow-through.
What cold laser therapy is (and what “cold” means)
Cold laser therapy—often grouped under low-level laser therapy (LLLT) or photobiomodulation—uses low-intensity light with the intent to support the body’s natural recovery processes without producing heat. Unlike heat-based tools that warm tissue, cold laser devices are designed to operate in a non-thermal way, so most users don’t feel a warming sensation during treatment.
People commonly use cold laser therapy to support comfort with minor aches, reduce post-activity stiffness, or assist soft-tissue recovery routines. Outcomes vary widely based on the condition, the treatment schedule, and individual response, so it’s best viewed as a supportive tool rather than a replacement for diagnosis, physical therapy, or urgent medical care.
For a medical overview and practical expectations, you can review resources from the Cleveland Clinic and the National Center for Complementary and Integrative Health (NCCIH). For general laser safety considerations, the FDA’s laser product guidance is also helpful.
Why an LED display matters for home treatment
At-home tools work best when they’re easy to repeat. An LED display can turn a “guess-and-go” habit into a consistent routine by making your settings visible and predictable.
- Clear session timing: A visible timer helps prevent sessions that are too short to be meaningful—or too long because you lost track of time.
- Mode indicators: If your device includes multiple modes, the display helps confirm what’s selected before you begin, which is especially useful when moving between sensitive and less sensitive areas.
- Better repeatability: Using the same settings over multiple days makes it easier to track what helps and what doesn’t.
- Easier shared use: When more than one person uses the device, a display simplifies “set-up and go” steps so sessions stay consistent.
Typical use cases for a handheld pain-relief laser device
A handheld format is built for localized attention—areas where you can comfortably place the treatment head and hold it steady. Common routines include:
- Muscle soreness after activity: Useful after training, long shifts on your feet, or physically demanding tasks that leave muscles feeling overworked.
- Overuse-related joint discomfort: Often applied to wrists, elbows, knees, or ankles after repetitive motion or extended loading.
- Back or neck tightness: Targeted placement can be practical for specific tender spots, as long as you can position the device steadily.
- Recovery support plans: Many people pair light-based tools with rest, gradual movement, and clinician guidance when needed.
If pain is severe, persistent, unexplained, or accompanied by swelling, numbness, fever, or loss of function, evaluation by a healthcare professional is the safest next step.
How to use it safely and consistently
Consistency matters more than “hero sessions.” A measured routine is typically easier to stick with—and easier to evaluate—than sporadic long treatments.
At-home routine checklist (example framework)
| Step | What to do | Why it helps |
|---|---|---|
| 1. Prepare | Wash hands, clean the area, get comfortable | Improves contact and helps the session feel steady |
| 2. Set session | Use the LED display to choose mode/time per instructions | Prevents inconsistent timing and reduces guesswork |
| 3. Treat | Hold the device still over the area and complete the timer | Targeted, repeatable exposure supports routine adherence |
| 4. Note response | Record soreness level and mobility changes over 24–48 hours | Helps decide whether to maintain or adjust schedule |
| 5. Combine wisely | Pair with gentle movement, hydration, and rest | Supports recovery without relying on a single tool |
What to look for in a handheld cold laser device
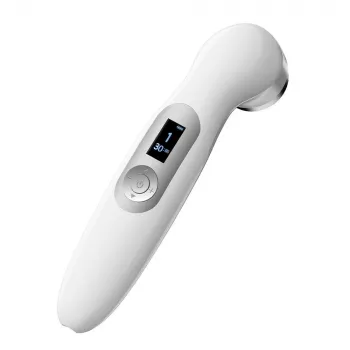
Product option: Handheld Cold Laser Therapy Device for Pain Relief with LED Display
If the goal is targeted, at-home sessions with simple controls, the Handheld Cold Laser Therapy Device for Pain Relief with LED Display is designed for localized use rather than whole-body coverage. The LED display supports clearer session management so it’s easier to keep timing and mode consistent from day to day.
More in-stock home picks (optional add-ons)
- Electric Tomato Strainer and Sauce Maker with Stainless Steel Body
- Ceramic Rectangular Vessel Sink with Blue Interior
FAQ
How long does it take to feel results from cold laser therapy?
Response varies: some people notice changes within a few sessions, while others need a few weeks of consistent use. Track pain levels and mobility for 1–2 weeks, and stop using it and seek care if symptoms worsen or new symptoms appear.
Is cold laser therapy safe to use every day?
Many routines use frequent sessions, but the right frequency depends on the device instructions and your sensitivity. Follow the manufacturer guidance closely, avoid eye exposure, and don’t use it in situations listed as contraindications.
Can a handheld cold laser help with joint pain and stiffness?
It may support comfort and mobility for some users, especially with overuse-related discomfort, but results vary and it isn’t a cure. Persistent, severe, or unexplained joint pain and stiffness should be evaluated by a clinician to rule out underlying issues.














Leave a comment